My First Homebrew
From the first time I learned about brewing beer as a career, I was extremely interested. I did a lot of research on the industry and profession and decided to pursue it as a hobby. As soon as I turned 21, I teamed up with my friend and split the cost of a homebrewing starter kit. After reading through most of “How to Brew”, I was ready to start my first homebrew.
Irish Red Ale
New Equipment: Minimum equipment needed for you’re first homebrew, Bottling Bucket, Auto Siphon, Bottle filler
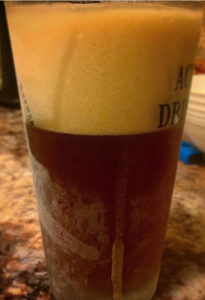
My first homebrew of an Irish Red Ale. The start of my passion.
Ingredients
Grains:
.5 lbs Belgian Cara 8
.25 lbs Briess Special Roast
.125 lbs Belgian Biscuit
.125 lbs English Chocolate Malt
Malts:
6 lbs Gold Malt syrup
Hops:
1 oz Willamette
1 oz US Goldings
Yeast:
Danstar Nottingham Ale Yeast
Brew Day – 3hrs 45 mins
Brewing day was finally here! After lots of research and waiting, I was excited to finally start homebrewing. I started the process by cleaning and sanitizing all the equipment. With the small kettle I had, it was necessary to brew a small batch and add water to the fermenter. I brought 2 gallons and 1 cup of water to a boil on the stovetop and then cooled it down. 1 cup went into a measuring cup, while the 2 gallons went into the fermenter to be used later.
Brewing
I then added 2 more gallons of water to the kettle and started to prepare the grains. I didn’t have a grain miller so got the grain milled ahead of time. The four grains went into a grain bag and these were steeped for 20 minutes before the water reached 170°F. While the grain was steeping I warmed the malt extract syrup in a bath of hot water so it would pour out easier.
After the grains were finished steeping, I turned the heat up and brought the wort to a boil. I then removed the kettle from the heat and added the malt extract. The wort boiled for 20 minutes after adding the extract and then I added the 1 oz of Willamette hops and set a timer for 60 mins. At 30 mins left, I added the 1 oz of US Goldings hops. When the timer went off, I prepared an ice bath and let the wort sit inside to cool it off.
Adding the Yeast
While the wort was cooling, I opened the yeast package and poured it into the cup of water from earlier. I let the yeast sit on top of the water and covered it for 15 mins. After 15 mins, I stirred the yeast into the water, recovered, and let sit for another 15 mins. When the wort temperature was lower than 100°F, I poured it into the fermenter with the 2 gallons from early. I then boiled another gallon and cooled it down. Adding this to the fermenter brought the wort up to 5 gallons. The yeast was then added to the fermenter and the lid attached. I then aerated the wort by shaking the fermenter around. I put the airlock into the fermenter lid and set aside to ferment.
Fermentation – 29 days
Careful observation of your brew is definitely an important aspect of the brewing process. With my first homebrew I fell off the wagon for this part of the brewing process but started off good. I have the first four days of the fermentation process down below with some observations. I observed how frequently the airlock bubbled, the temperature reading, and the smell of yeast.
Observation Log
18 hours: Airlock is bubbling continuously, approximately 1 bubble per second. Fermenter temperature gauge reading at 78°F with a strong smell of yeast throughout the room.
1 day 1 hour: Airlock is bubbling ferociously, approximately 5 bubbles per second. Fermenter temperature gauge reading at 78°F, the yeast smell is still around but not as prevalent as before.
1 day 12 hours: Airlock is bubbling ferociously, approximately 5 bubbles per second. Fermenter temperature gauge reading at 74°F, with a slight yeast smell up close.
1 day 18 hours: Airlock is bubbling continuously, approximately 2 bubbles per second. Fermenter temperature gauge reading at 78°F, slight yeast smell throughout the room.
2 days 18 hours: Airlock is not bubbling, fermenter temperature gauge reading at 72°F.
3 days 6 hours: Airlock is bubbling slowly, approximately 1 bubble every 13 seconds. Fermenter temperature gauge reading at 74°F
3 days 14 hours: Airlock is not bubbling, fermenter temperature gauge reading at 76°F. Slight yeast smell throughout the room.
4 days 5 hours: Airlock is not bubbling, fermenter temperature gauge reading at 82°F. Strong yeast smell throughout the room.
Bottling
I’ve always been thrifty. That being said, I recycled old bottles instead of purchasing new ones. This is a great option if you drink a lot of beer and don’t want to purchase new bottles each time you brew. If you decide to go with this option, it’s important to clean and sanitize the bottles. In order to do this, I cleaned my sink and a bucket and then prepared some soapy water. In the bucket, I prepared some sanitizing solution. I cleaned the bottles in the soapy water with a brush scrubber. I then rinsed them out, sanitized with the solution, and let sit out to dry. The bottling bucket, siphon, tubing, and bottle caps were then cleaned out and sanitized.
To start the priming solution, I brought 2 cups of water and 5 ozs of cane sugar to a boil. After 7 minutes of boiling, it was set aside to cool. After siphoning the beer into the bottling bucket, being careful not to splash it around, I added the priming solution. Gently stirring the priming solution and beer together without splashing the beer will mix them together without aerating the beer. After stirring, I then filled the bottles using the bottle filler and capped it with a sanitized cap. I then stored the bottles in a cool, dry place for a couple of weeks to carbonate and eagerly awaited for the moment I could try them.
Thoughts
My initial thought on this beer was how much carbonation was in it. A well-carbonated beer will have about half an inch of foam after pouring, while this one had 2 inches. The beer had a nice light red color and a fruity smell to it. The carbonation tingled your mouth and throat while going down and cleansed your palate. The low bitterness and fruit taste were dangerous as it was such easy drinking and made me want to continue drinking more. Overall, a very good beer, especially for my first homebrew.
My friend Ali said that it had a nice color and was a little cloudy in a good way. He said it had a fruity scent, with a hint of cherries. It had a satisfying taste of fruit punch, with low IBUs or in other words, not very hoppy or bitter.
Lessons Learned
I could fill a book with the lessons I learned with my first homebrew alone. Before this process, I had very little knowledge of the brewing process. The largest lesson I learned would be that wort and beer are very sticky. Very, very sticky. I brewed this in my kitchen and had some overflowing of the kettle while brewing wort and overflowing of the bottles while bottling. This made my stovetop and kitchen floor very sticky and I had to deep clean my kitchen.
Let me know about your first homebrewing experience in the comments below! Notice something that I can change to improve my brews in the future? Let me know below! Be sure to follow my social media and sign up for my newsletter to stay up to date on my adventures!
0 Comments